Curious about how to bake with a water bath? Discover how this technique helps create creamy, crack-free desserts every time!
If you’ve never tried baking cakes with a water bath, I’m here to help. All it involves is placing your cake pan inside another larger pan of hot water while baking.
And why? It’s so cakes bake nice and evenly and don’t develop cracks. It also stops them from becoming dry and rubbery.
All you need is a baking pan large enough to hold your cake pan. So let me show you the whole process—and you’ll be baking delicious, moist cakes in no time!
Why Use a Water Bath?
Baking with a water bath is crucial for certain recipes! They’re mostly used for cheesecakes, but also for baked custards like flan, crème brûlée, and soufflé.
The main reason is even cooking. With the cake pan in the water, it heats more gradually and consistently. This stops the outer edges from cooking too fast—which causes cracking.
Water also prevents overheating. It limits the max temperature around the cake to 212°F (100°C)—the boiling point!
And finally, the water creates a nice, moist atmosphere in the oven. This keeps delicate desserts from becoming too dry.
What You Need for Water Bath Baking
Baking Pan
This is where your cake batter goes. There’s two main choices:
- Cheesecakes: You’ll need a springform pan (this one works well). They allow you to remove the cheesecake without turning it upside down.
- Regular cakes: Just use an ordinary cake pan for regular cakes. My baking equipment post has some good recommendations.
Just make sure whatever pan you choose can fit inside your larger, water bath pan.
Water Bath Pan
This is what your baking pan sits inside, and it gets filled with hot water. You need a pan large enough to hold both the baking pan and the surrounding water.
A high-sided roasting pan works the best, but any large, deep dish will do. You need to be able to fill it with enough water, about half-way up the smaller pan, and still have a bit of room at the top.
Expert Tip: Transferring a filled water bath to the oven can be tricky. They’re heavy, and the hot water can spill if you don’t keep it level. So, stick with a high-sided roasting pan, like this one!
As a last resort, a 9″x13″ baking dish with raised edges can work. The edges need to be at least 1-inch high, and you’ll likely need to put it in the oven first before adding the hot water, which could be tricky.
Full Equipment List
Here’s a full list of everything you need do a baking water bath:
- Cake pan (springform or regular)
- Larger “bath” pan – high-sided roasting pans work best!
- Kitchen foil (if using springform pan)
- Parchment paper (springfrom pan only)
How to Bake Cakes in a Water Bath
Here, I’ll explain how to bake a cheesecake using a springform pan, though the method is similar for other cake recipes.
If you’re not using a springform pan, you can skip the first two steps!
Step 1: Preparing a Springform Pan
If you’re using a springform pan, you’ll need to waterproof it with tin foil:
- Cut two long pieces of foil, each about twice your pan’s diameter.
- Lay them out on your counter in a crisscross pattern.
- Place a square piece of parchment paper on top, right in the middle. Place it diagonally so one corner points upward.
- Put your cake pan right in the middle.
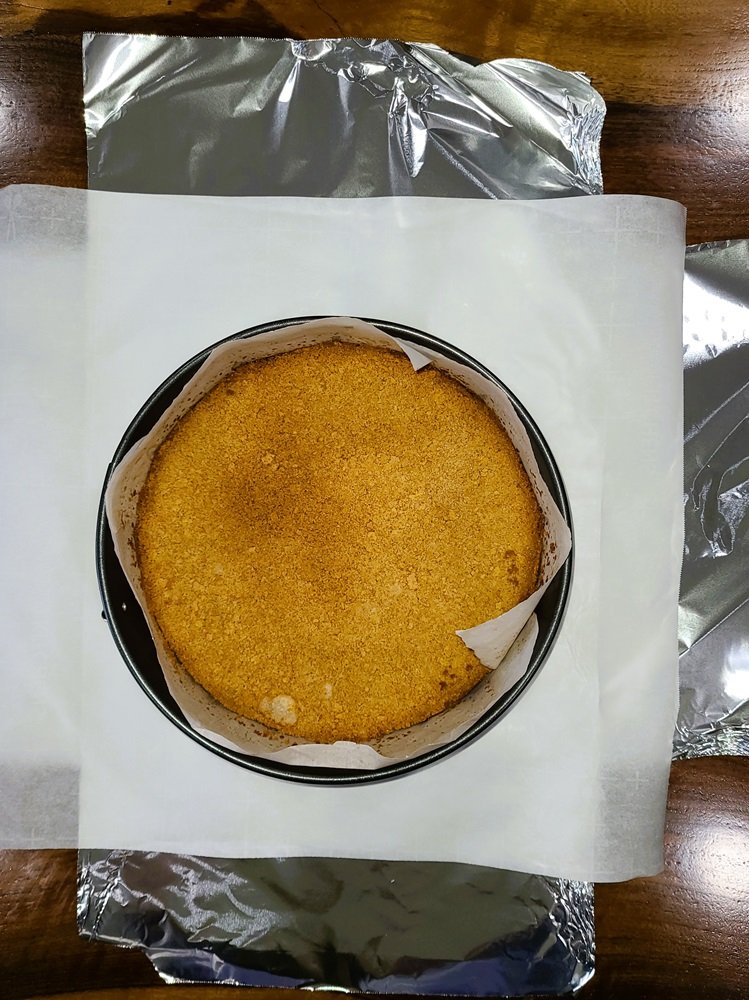
Step 2: Wrapping The Exterior of the Springform Pan
Lift the foil and parchment up, wrapping them tightly around the bottom and sides of the pan. Carefully smooth around the edges, making sure there’s no holes.
Springform pans are great, and essential for cheesecakes, but sometimes they’re not fully water-tight. By wrapping the pan like this, we stop any water from getting in—we don’t want any soggy cheesecakes!
Important: Make sure the sides of the pan are completely covered, and be careful not to tear the foil while wrapping. Check for any holes.
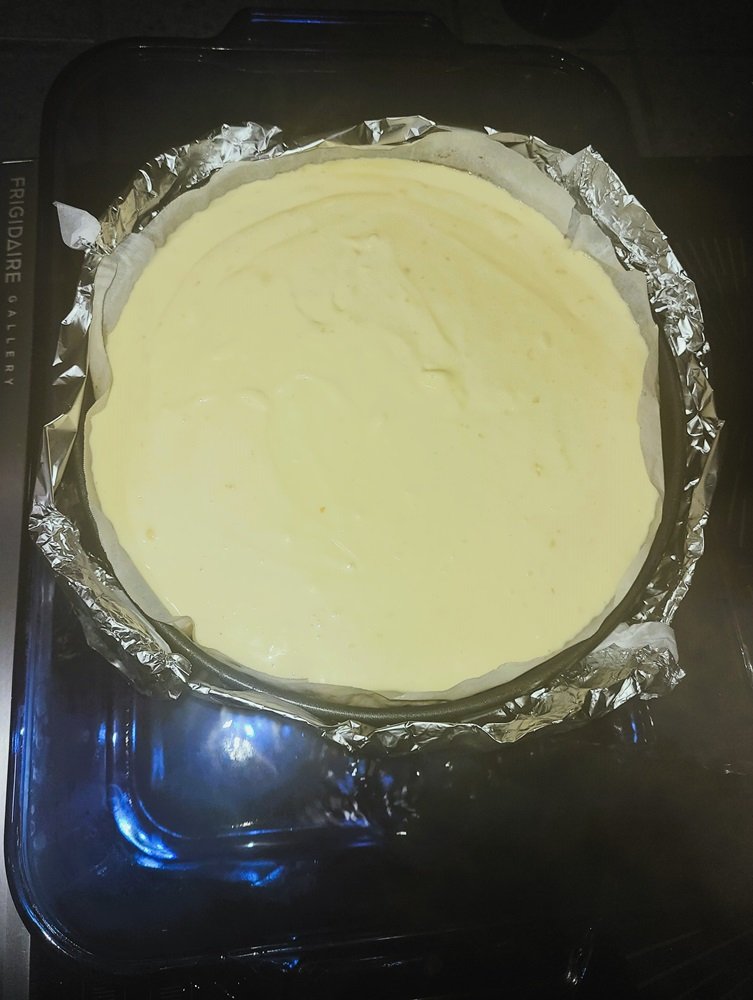
Step 3: Place Pan in Water Bath Pan
Now we’ll get everything together:
- Set your cake or springform pan inside the larger roasting pan.
- Pour the prepared filling into your cake pan and gently smooth the top so there’s a nice even surface.
You’re now ready to add the water!
Step 4: Filling the Bath and Baking
There are two ways to set up your water bath and fill it up. Choose whatever method feels safest and easiest for you.
I find it easiest to use Option 2 using my electric kettle.
Option 1: Fill the Water Bath Before Placing in the Oven
By filling before going into the oven, you can see exactly how much water you’re using:
- Pour boiling water into the roasting “bath” pan until it reaches halfway up the sides of the cake pan.
- Carefully transfer the filled water bath to the oven—use oven gloves!
Just be careful, transferring it to the oven can be tricky, especially with hot water sloshing around.
Expert Tip: If you’re worried about the weight, you can half-fill the water bath before moving it to the oven, then top it up with more water once it’s in there.
Option 2: Fill the Water Bath After Placing in the Oven
Place everything in the oven first, then carefully pour boiling water into the roasting pan until it reaches halfway up the sides of the cake pan.
This way is easier and safer to handle, as you’re not moving a heavy water-filled pan. The problem is, you might find it difficult to fill the pan if you have a small oven and don’t have a kettle or teapot with a long spout. Try a gooseneck electric kettle to make it easier.
Step 5: Bake
Avoid opening the oven while baking with a water bath. Opening the oven will let all the steam out and can deflate the cake or souffle. It’ll also dry out the oven, and in turn could dry out your cake, too.
Step 6: Remove from Water Bath and Chill
Once you cake is fully cooked:
- Carefully lift the cake out of the water bath, taking care not to spill any of the hot water. Use a kitchen towel or oven mitts.
- Gently remove the foil and parchment from the outside of the pan.
- Use a towel to wipe away any moisture left on the outside of the pan.
- If you’re baking a cheesecake, just like in my Persimmon Cheesecake Recipe, it’ll need to go in the refrigerator for at least 8 hours.
If you’re lucky enough to be blessed with a large oven, you can lift the cake out of the water bath while it’s still in there. Again, just be careful with the hot water.
Important: Let the cheesecake cool to room temperature before placing it in the fridge—this stops condensation from forming on the top.

Expert Water Bath Cake Baking Tips
- Use hot water: Always use hot water for the water bath! Cold water will completely mess with your recipe and baking time.
- Avoid splashing: Be very careful not to splash water into the cake pan when you fill the water bath.
- Follow your recipe: This guide is a helpful tool, but remember that your recipe is key. Be sure to follow it as your primary source.
Final Thoughts on Water Bath Baking
All-in-all, water baths are essential for baking cheesecakes and other delicate desserts. They help things cook evenly, and stop any cracks.
Next time you bake a cheesecake, give a water bath a try and let me know in the comments how it turned out!
